How To Setup Screen Sync
Sync content playback across groups of screens running via SoC or media players

Enable multiple screens to play content in perfect time with each other. Assign as many screens as you wish to a sync group, and all of these screens will start playing at the same time. This means you can have screens across a venue changing in sync to show different content.

Display videos seamlessly across multiple screens. With screen sync initiating playback simultaneously on all displays, you can create a cohesive flow of content throughout. This functionality is particularly effective for splash videos in QSR's and video walls where several screens are closely mounted together, enhancing the overall visual experience.
Available on the following app versions:
- Android (v5.0.1+)
- Windows (v5.0.1+)
- MAC (v5.0.1+)
- BrightSign (v5.0.1+)
- Samsung Tizen (v0.9.3+)
Please note: NowSignage cannot guarantee screen sync compatibility across all devices running the app versions stated above, this needs to be tested on a case by case basis, as results can vary depending on various aspects (RAM, Processing Power, Date/Time Config, Network Speed).
![]() Important Update on Screen Sync
Important Update on Screen Sync
We have introduced a new screen sync method that uses a local server for improved reliability. This replaces the previous WebSocket-based approach described in this guide, which is no longer supported in the latest app versions.
The new method has been fully tested on Tizen 7 devices, where it runs automatically. On other platforms, additional hardware and setup may be required, and compatibility should always be confirmed before deployment.
For the most up-to-date instructions and to check hardware compatibility, please contact our Support Team before setting up screen sync.
Important: For optimal performance of Screen Sync, it is strongly advised to use the same hardware and each screen must operate on its own media player or System on Chip (SoC), which can then be grouped together in a 'sync group'
Note: Screen Sync App comes FOC as part of your NowSignage License: If screen sync App feature is not available in your account, please raise a support case and the team will enable this.
To set up Screen Sync:
- Click into the Apps section within the NowSignage CMS.

- Click the 'Screen Sync' App and then click the 'Install App' (Green button)

Creating a Sync Group:
After accessing the app:
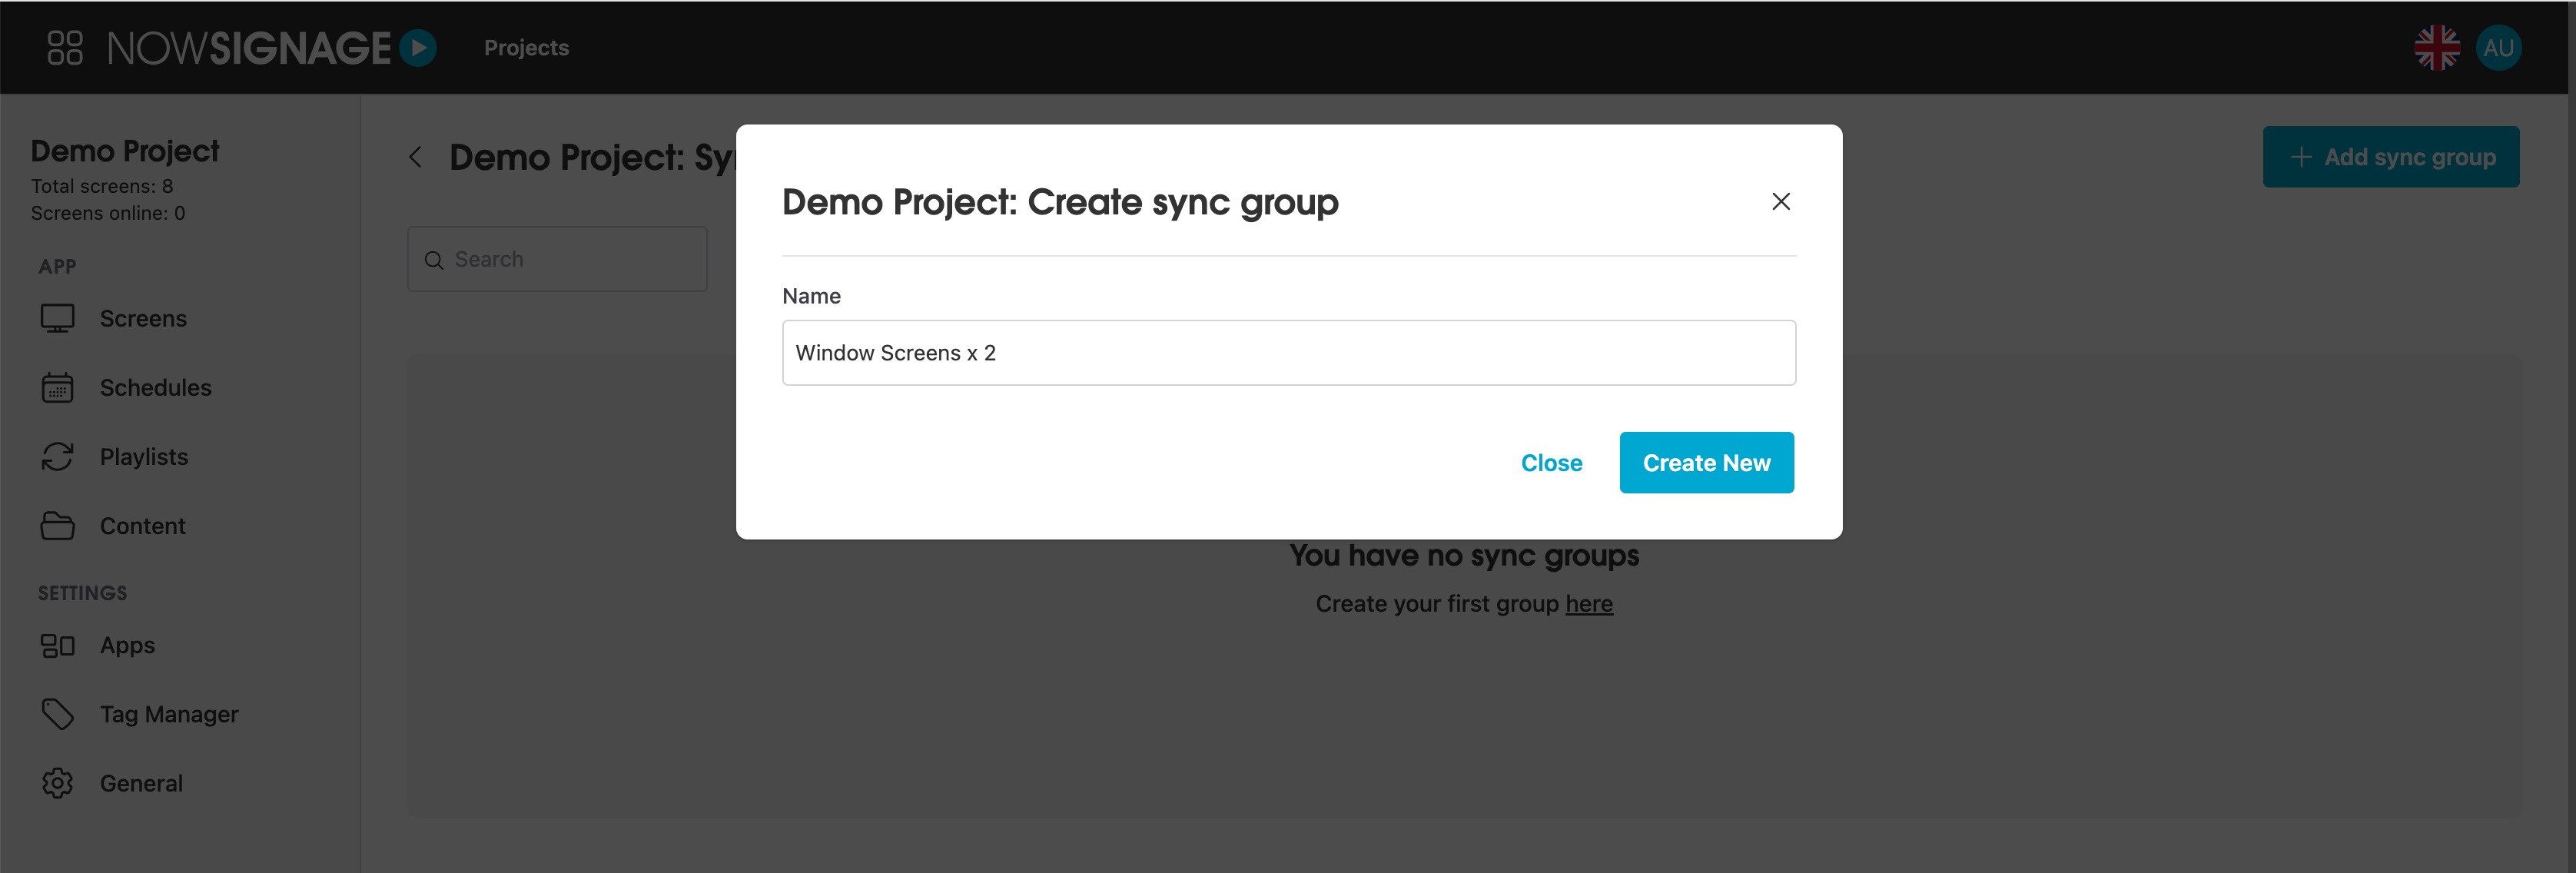
- Click on the '+add sync group' button.
- Enter a name for your sync group, and when you are ready, click 'create new' to proceed.

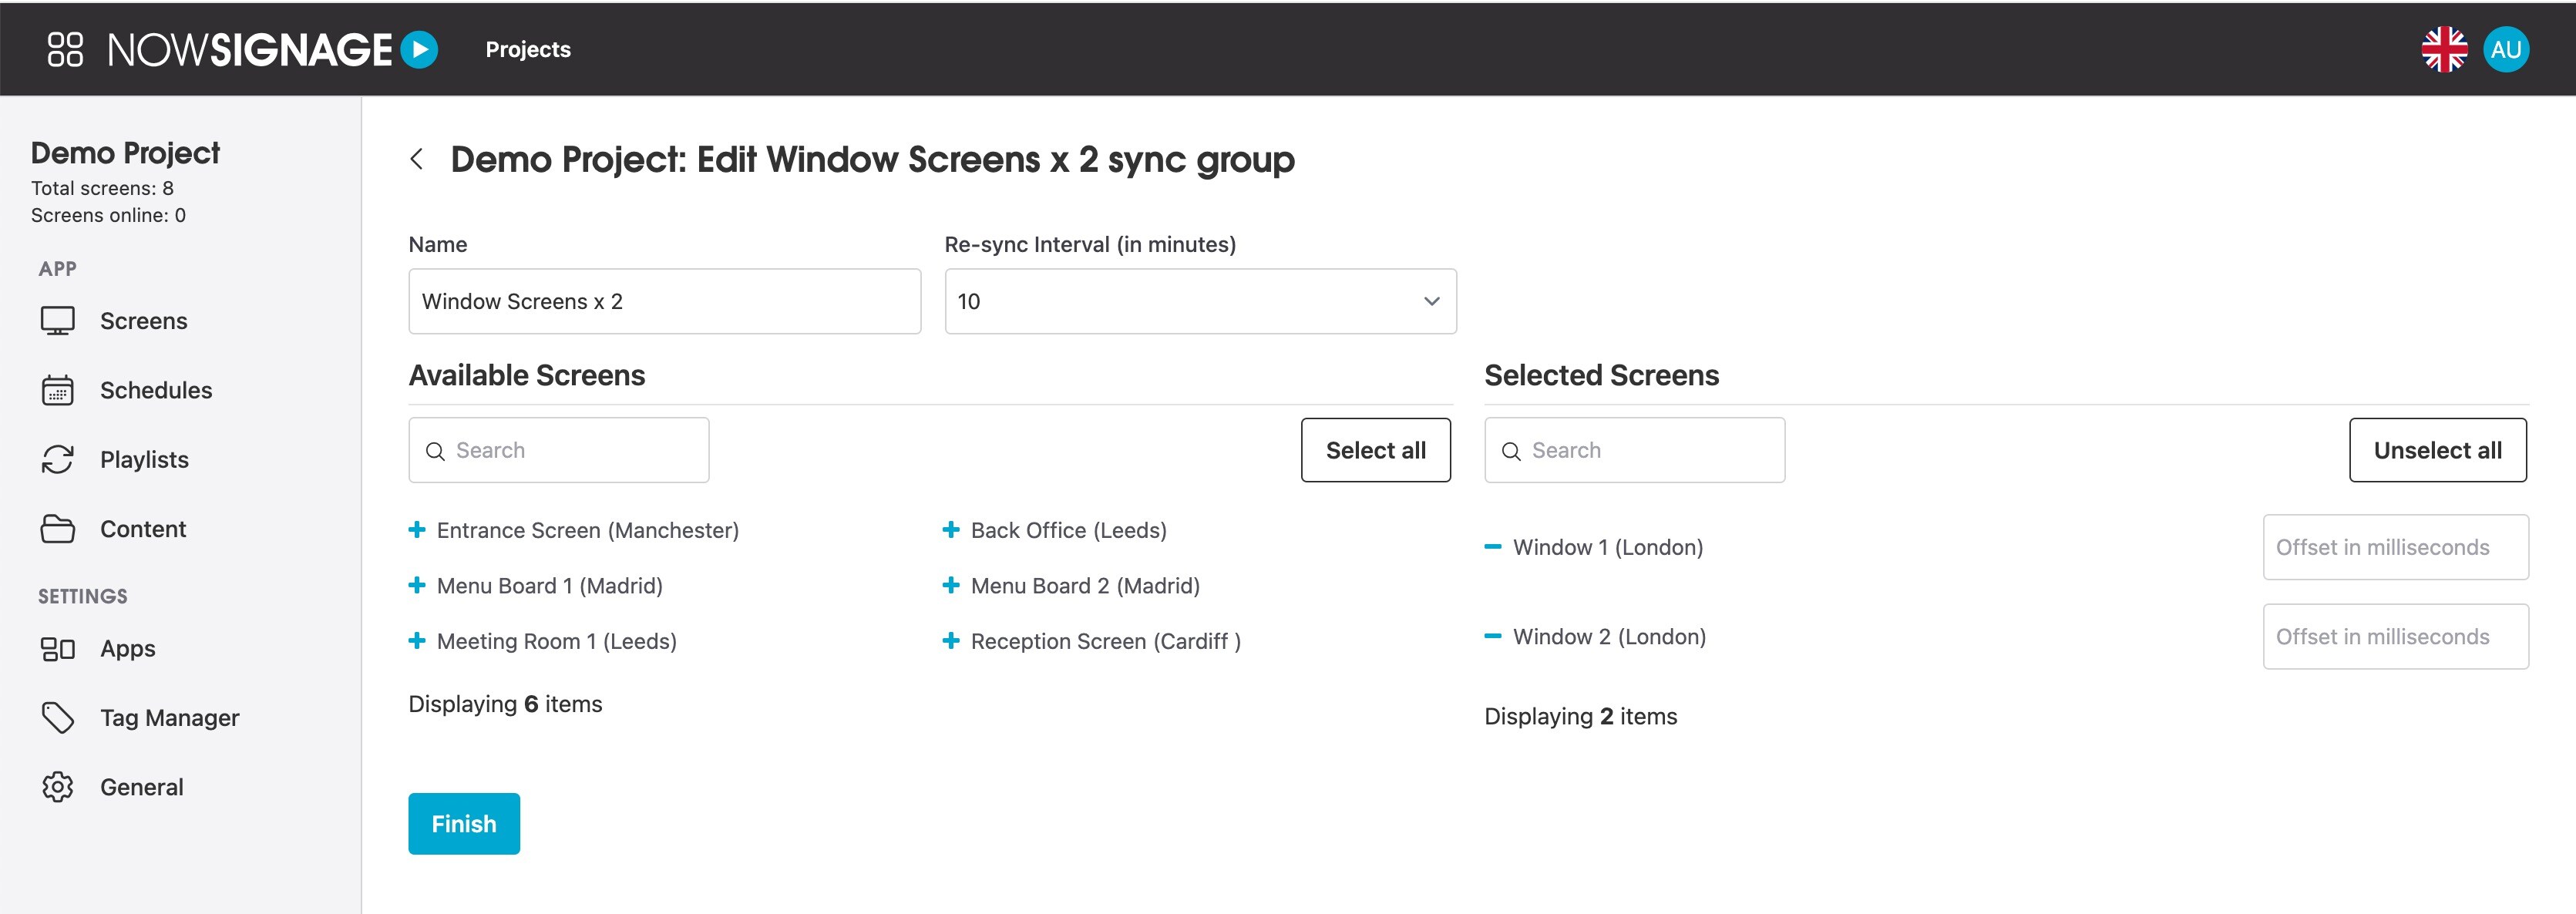
You can now locate the screens you wish to include in the sync group by searching for them either by their names or their locations.
To select the screens for synchronisation, simply click on the names of the desired screens displayed on the left side of the interface.
This will then add the screens to the sync group.

- 'Offset in milliseconds': Can be used if different hardware is being used for the Sync - Please refer to the 'Important Notice' at the top of this article.
- 'Re-sync Interval' (Recommended) Set a 'Re-sync interval' for your sync group, which will prompt the app to refresh the content periodically. This is particularly useful in situations where synchronisation may gradually drift due to hardware discrepancies.
After confirming your selections, click 'Finish' to create your sync group.

Note: When creating or editing a 'sync group' after you have launched the app, you will need to reboot the app in order for the sync to take affect.
Creating your playlists:
Depending on your system is configuration, there are two primary methods for synchronising content across displays. You can choose to:
Method 1: Synchronise the same content across multiple displays simultaneously.
Method 2: Synchronise different content across multiple displays at the same time.
To implement Method 1: (same content across multiple displays simultaneously)
- Create a playlist that includes all your desired assets.
- Assign this playlist to a schedule, and then apply that same schedule to each screen you wish to synchronise.
Example: (Using three pieces of content)
Playlist 1:
Menu image1 (playing for 8 seconds)
Menu image2 (5 secs)
Video1 (20 secs)

To implement Method 2: (different content across multiple displays at the same time)
- Create multiple playlists
Caution: It is crucial that each item in every playlist is set with the same play duration to guarantee that the content transitions simultaneously across all screens.
- Assign: After creating the multiple playlists for your screens, assign each playlist to its own schedule, and then apply these distinct schedules to the respective screens within your sync group.
Example: (Using three pieces of content)
Playlist 2
Menu image 3 (playing for 8 seconds)
Menu image 4 (5 secs)
Video 2 (20 secs)

After you have set up the different playlists for your screens, add these to separate schedules, then apply the individual schedule onto each screen within your sync group.
⬇️⬇️⬇️⬇️
After you have set up the different playlists for your screens, it's essential to organise these playlists into distinct schedules that dictate when each playlist will be displayed.
To do this, navigate to the schedules section of the NowSignage CMS. Here, you can create a new schedule for each playlist by specifying the start and end times, as well as the frequency of playback.
Once you have configured the schedules according to your desired timing, you can then apply each individual schedule to the corresponding screen within your sync group. This step ensures that each screen plays its assigned playlist at the designated times, allowing for a coordinated display of content across all devices.
Make sure to double-check that the schedules are correctly aligned with the playlists you created earlier. This attention to detail is crucial for achieving a seamless experience across all displays. After applying the schedules, your screens will be ready to showcase the synchronised content as planned, enhancing your audience's experience with dynamic and engaging visuals.
Once the NowSignage app is successfully installed on all screens within your sync group and the content has been downloaded, a 'syncing screens' icon will appear in the bottom left corner of each display. When the synchronisation command is initiated, all screens will align perfectly, displaying the content simultaneously.
![]()
Further Reading: How to create a fullscreen takeover using Screen Sync
Troubleshooting:
Q. Delays in content synchronisation:
A. Verify that the date and time settings on your hardware are consistent across all media players and System on Chip (SoC) screens.