
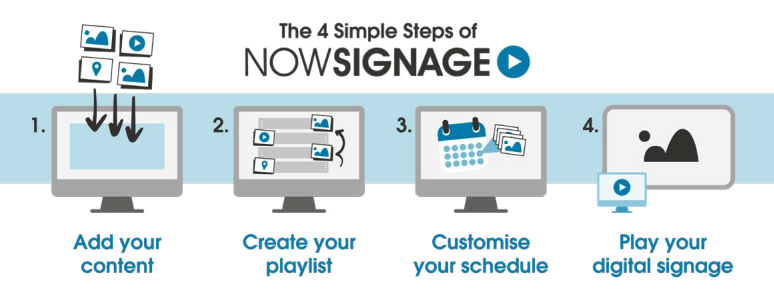
Display any type of content on any screen or group of screens exactly when you want
Our scheduling tool is the simplest to use on the market. It allows users to fully automate which content gets shown, on to which screens and when. Create seasonal campaigns, or target content to a specific hour or even minute. Once a schedule is created, it can be altered at anytime and live changes take place straight away
Easily control and schedule content for large networks of screens. Simply create a timeslot by entering in the times and days you’d like to display your content, then you’re good to go! Through advanced tagging options, users can easily manage a large network of screens just as easily as a small one, so it does not matter how many screens you have, you’ll always be in control. It’s important that users are able to easily see which of their screens have scheduled content allocated to them and whether or not those screens are online or have ever been online.
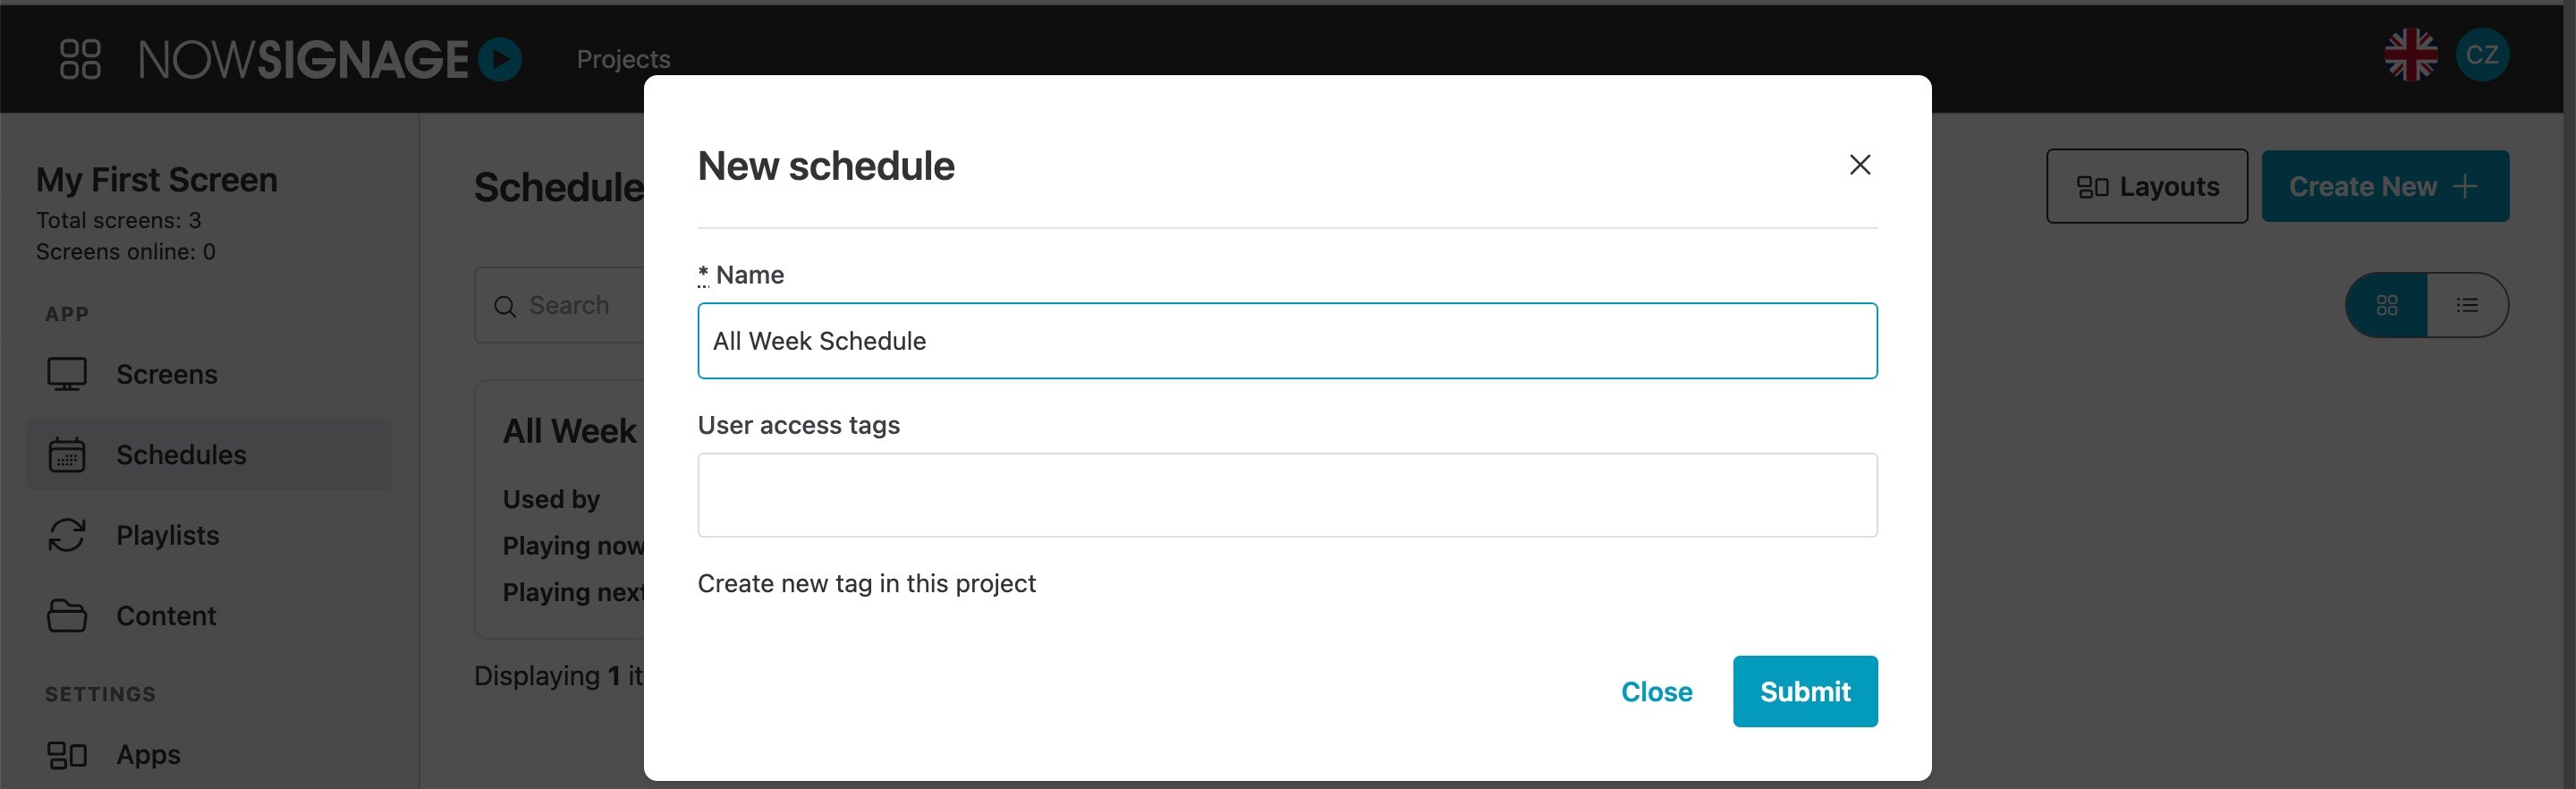
To create a schedule:
- Navigate to your NowSignage Dashboard and select the project you want to use.
- Click the ‘schedules’ tab located on the left sidebar.
- Click ‘Create Add new+’ (Blue button top right) and then select 'Add Schedule' from the option list.
- Give your schedule a name and click create:
TIP - If you have created any User Access Tags on your project, you can add these in this step, by selecting from the dropdown list.
Once created, either click on the schedules name or on the pencil icon to edit your schedule, where you can then choose which playlist or Layout you wish to assign to your schedule.
Day Parting Schedules
Day parting allows different playlists or layouts to display at different times of the day.

Create a Day Part Schedule
- Create the required playlists or layouts (you can either add content at this point or add the content later)
- Navigate to Schedules
- Select Add New
- Select Add Schedule
- Fill in the following
- Name (Required)
- Folder (Optional)
- User Access Tags (Optional)
- Select Create Schedule
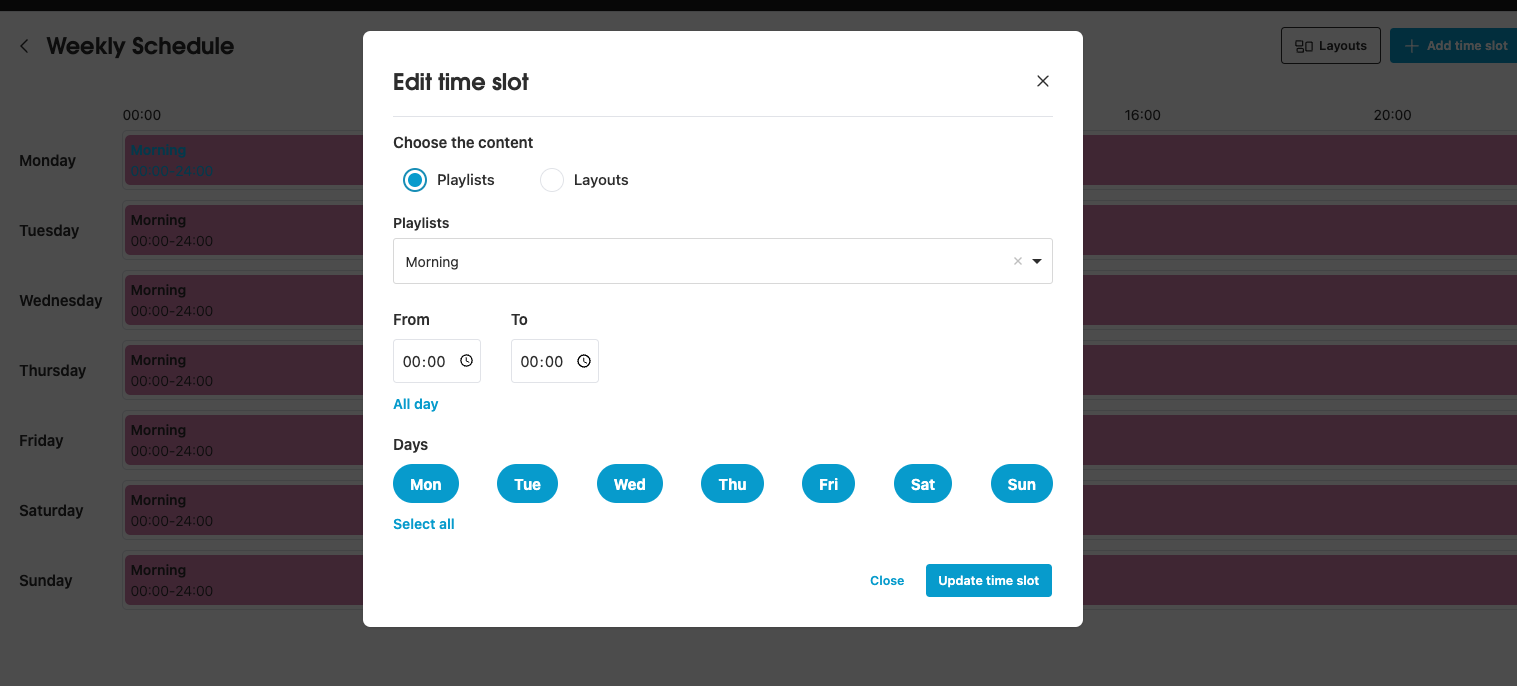
- Select Add Time slot
- Select Playlist or Layouts
- Select time using 24hr time picker From and To
- Select Days (Either individual or choose Select all)
- Select Create time slot
- Repeat for each daypart
Edit a Schedule
- Select Schedules
- Select Playlist name in schedule
- Make selections again
NOTE: If you select all days and later want to remove the selection, click the recycle bin icon. This will remove the selection from all days.
You can also edit the specific days a schedule is displayed by selecting the playlist name within the Schedule Viewer.
FURTHER READING.
- Schedule an automatic content takeover across your screens - How to set up an Override
- NowSignage CMS User Guides - Schedules
Troubleshooting / FAQ
Q. I have configured a set schedule for a portion of the day, but when the app launches, I encounter a black screen or incorrect content that should be displayed at a different time.
A. If there are empty time slots in your schedule and you load the app on a physical screen, it will show a black screen because there is no content available for that time. The Schedules feature synchronises with your device's date and time settings, so any discrepancies may lead to issues such as a black screen or incorrect content being shown at the wrong time. We suggest checking your device's settings to ensure these are accurate so that this aligns.