
Once you have created a schedule, you can assign it to your screens using two methods: individually (one screen at a time) or in bulk (multiple screens at once).
Table of Contents:
1. Assigning a Schedule to an Individual Screen
2. Assigning a Schedule to Multiple Screens (Mass Management)
1. Assigning a Schedule to an Individual Screen
To assign a schedule to a single screen:
-
Navigate to the Screens tab.
-
Click the screen name or select the Edit (pencil) icon.
-
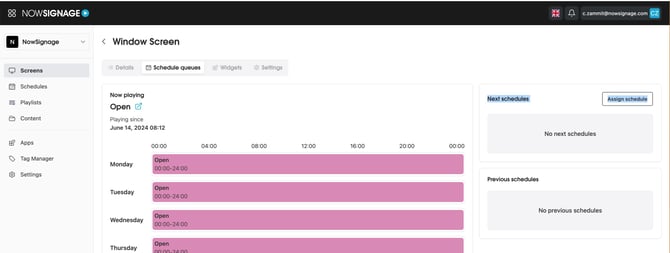
Open the Schedule Queues section.
-
Click Assign Schedule.
On the next screen:
-
Choose the desired schedule from the dropdown list.
-
Once selected, click Assign Schedule to apply it to your screen.
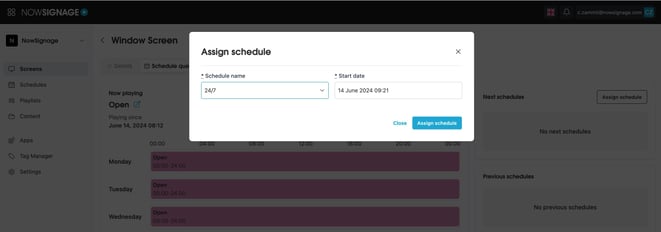
On the next screen, you can select which schedule you want to play from the dropdown list. When you are happy with your selection, click 'Assign Schedule' to apply this to your screen:
⚠️ Warning: Time Zone Differences When Assigning Schedules
When assigning schedules to screens that use a different time zone from your own, be aware that all scheduled times are stored in the project’s time zone. This means the times you see or enter may not align with your local time.
Before confirming or saving, verify that the intended schedule times are correct in the project’s time zone to avoid misaligned or incorrect scheduling.
-
Scheduled Queues
Scheduled queues allow you to stack multiple schedules so screens automatically transition from one schedule to the next.
To set up a scheduled queue:
-
Go to the Screens tab.
-
Locate the Next Schedules section.
-
Click Assign Schedule.
-
Select the schedule name and start date from the menu.
⚠️ Please also observe the time zone warning above when configuring scheduled queues.
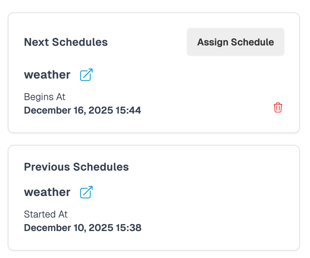
Your screen will now display:
-
The current schedule
-
The next (upcoming) schedule
-
The previous schedule (if applicable)
2. Assigning a Schedule to Multiple Screens (Mass Management)
To apply a schedule to several screens at once:
-
Navigate to the Screens tab.
-
Select all screens you want to update.
-
Choose Mass Management > Schedule Selected.
-
Assign the desired schedule to all selected screens simultaneously.
This method is ideal for managing large deployments or updating multiple screens with consistent scheduling.
 ⬇️⬇️⬇️⬇️

⚠️ Please Note: To perform these actions in bulk for multiple screens, consult the Mass Management Guidance.
knowledgebase.nowsignage.com/nowsignage-cms-mass-management-actions
Bulk actions are permission-based. - Users with full access (Owner, Project Manager) can perform large-scale updates such as scheduling screens, applying settings, activating widgets, or deleting multiple items at once.