
This guide details the procedure for remotely migrating Samsung Smart Signage Platform (SSSP) displays from a third-party CMS (like MagicInfo) to NowSignage by configuring the URL Launcher within the MagicInfo Remote Management (RM) server.
❗️ Compatibility Note:
This process is applicable to any compatible display model, specifically those running Tizen 4 (SSSP6) onwards, provided the display is compatible with and registered on the Samsung Remote Management (RM) server.
❗NowSignage cannot provide troubleshooting support or training for the MagicInfo platform. If you need assistance with MagicInfo, please contact Samsung directly.
Preconditions for Remote Migration:
The following four conditions must be met for this remote migration process to be successful:
- Network Connection: The Samsung device must be connected to the network (wired or wireless).
- Existing RM Setup: The device must have been previously set up and registered with the MagicInfo Remote Management server.
- Active RM Licence: The customer must have a valid Remote Management Server Licence for the displays being migrated.
- RM Portal Access: The customer must have full access to the MagicInfo RM server web portal to perform the remote control actions.
Step-by-Step Remote Migration Process:
Part 1: Configuring the NowSignage URL
This part involves using the RM portal to remotely configure the NowSignage application URL into the device settings.
- Log In to RM Portal:
- Navigate to the MagicInfo Remote Management web portal:
https://rm.magicinfoserver.com/MagicInfo/ - Log in using your credentials.
- Select Displays (Group by OS):
- Tizen 4 & 5 use one unique NowSignage URL.
- Tizen 6.5 onwards use a different unique NowSignage URL.
- Once logged in, you will see a list of displays.
- Crucially: Select displays in bulk based on their Operating System (OS) version.
- Only select devices in bulk that share the same Tizen version to ensure the correct application is installed.
- Access Device Settings:
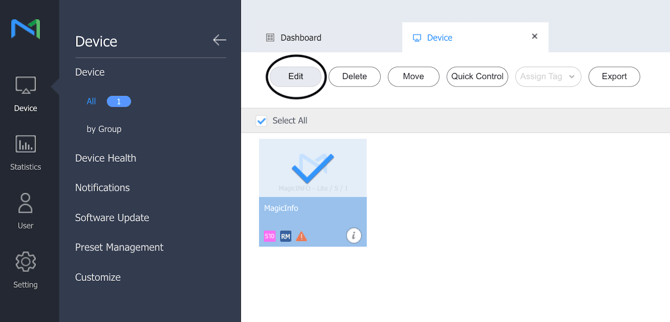
- Select the player(s) you wish to edit.
- Click the 'Edit' button. This will take you to the area where device settings can be changed.
- Insert URL Launcher:
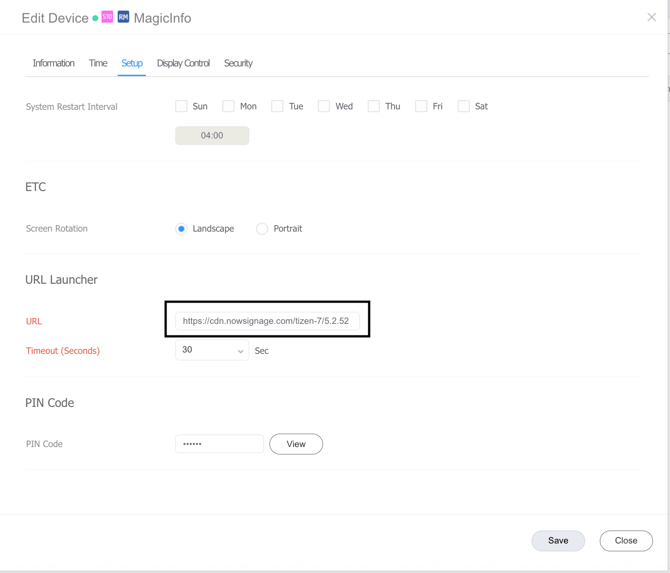
- Navigate to the 'Setup' tab.
- Scroll down to the 'URL Launcher' section.
- In the URL field, insert the NowSignage application URL corresponding to the Tizen version selected in Step 2.
Reference URL: For the most up-to-date URLs, please consult the NowSignage knowledge base:
-
- Click 'Save' to save the configuration setting. This change should apply remotely to the display(s).
Part 2: Remotely Launching the Custom App
After the URL is configured, you must now remotely instruct the display to exit MagicInfo and launch the new Custom App.
- Access Remote Control:
- Return to the list of displays.
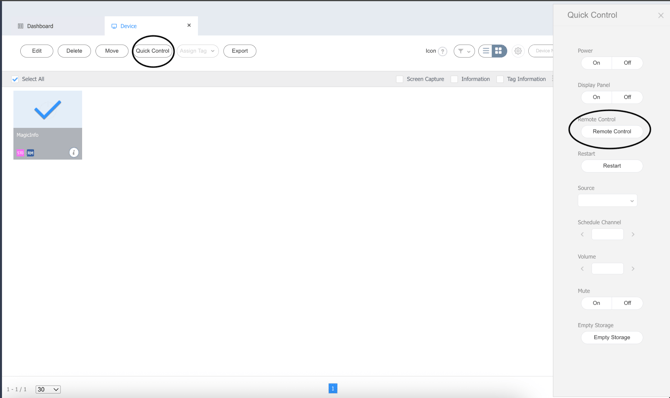
- Select the screens (again, select based on the same OS version if performing bulk actions, as menus may differ).
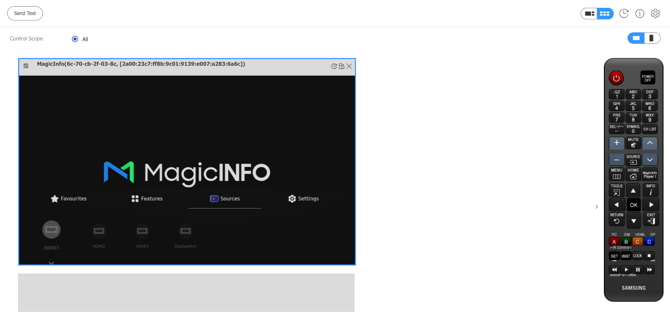
- Click 'Quick Control', then 'Remote Control'. This brings up a live view of the screens and a virtual remote.
- Exit MagicInfo:
-
- If the screen is currently running MagicInfo as the main source, you must first exit it.
- Click 'Source' on the virtual remote.
- Click 'OK' on an available standard source, such as 'HDMI 1'. This will exit the MagicInfo app.
- Change Play Via Setting:
-
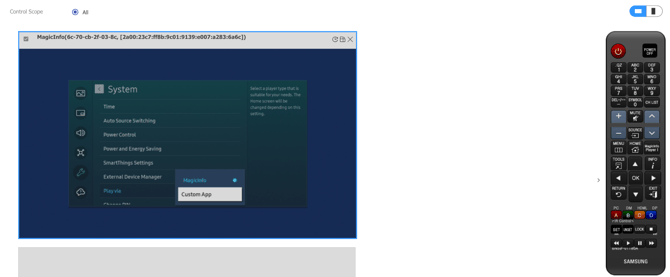
- Click 'Menu' on the virtual remote.
- Navigate to 'System'.
- Navigate down to 'Play Via' and change this setting from 'MagicInfo' to 'Custom App'.
- Launch NowSignage:
-
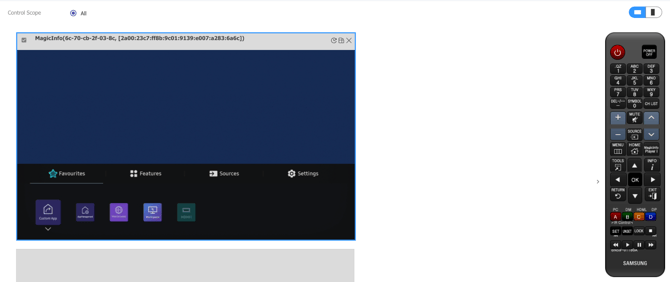
- Exit the menu.
- Click the 'Home' button.
- Select the 'Custom App' option. This will communicate with the server and initiate the download of the NowSignage application directly onto the display via the URL configured in Part 1.
Part 3: Individual Device Activation (PIN Entry)
Once the app is downloaded, it will prompt for a unique PIN. This step must be done individually.
- Exit Bulk View: If you were using bulk actions, exit this view on the RM server website.
- Access Individual Remote Control: Individually remotely access the screens one by one.
- Enter PIN and Activate:
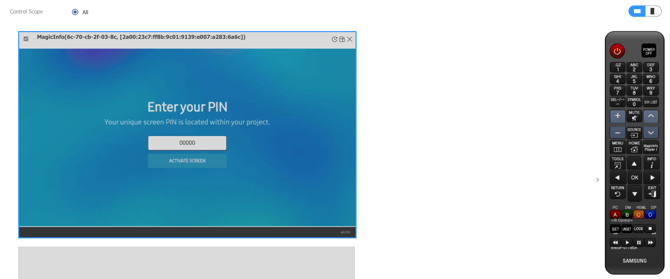
- The NowSignage app will be running and displaying a unique PIN code.
- Enter your NowSignage PIN for that specific screen using the virtual remote/keyboard.Click 'Activate'.
- Completion:
The display will connect to the NowSignage servers, download, and display the scheduled content. The display is now set up to run the NowSignage app.