
In NowSignage app version 5.3.31 and later, Screen Sync uses a single playlist to manage content across all screens in a sync group. Add your content assets to one playlist and use a single schedule, rather than creating separate playlists for each screen.
To display different content on each screen while keeping playback synchronised, apply matching targeted tags to the content assets within the playlist and their intended screens. For example, content assigned the 'screen1' targeted tag plays on the screen with the same tag. This lets each screen display its assigned content while synchronising content transitions across the group.
Screen Sync supports the following use cases:
-
Use Case 1: Content split across multiple screens to look like one video moving across all screens.
- Use Case 2: Multiple screens in a row playing the same adverts at the same time for store-wide brand exposure.
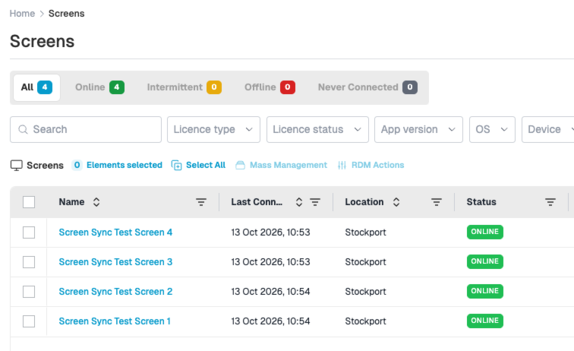
Follow the steps below to configure this setup. In this example, four screens each display one content asset, with content transitions synchronised across all four screens.
❗This guide assumes you have the permissions needed to access the required features. If you cannot access a feature or complete a step below, contact your account owner.
⚠️Use Case 2:
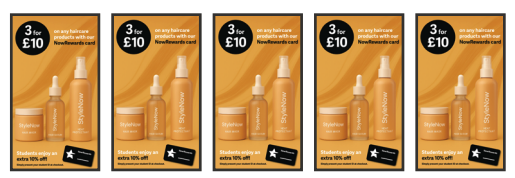
To play the same content on every screen in the sync group, create a single playlist containing all your content assets by following this guide. Targeted tags are not required. The sync group then synchronises playback so that all screens display the same content at the same time.
-
Use Case 1:
In the demonstration detailed in this guide, the screens are named 'screen-1', 'screen-2', 'screen-3' and 'screen-4', with corresponding targeted tags named 'screen1', 'screen2', 'screen3' and 'screen4'.
Each screen requires its own ‘piece’ of the video uploaded as its own asset. For the above example, four 1920x1080px video files will need to be created.
For example, content tagged 'screen1' plays on 'screen-1', which also has the 'screen1' tag.
✋ If your project already contains uploaded content, screens, schedules or playlists, use the table of contents below to go directly to the setup step you need.
📘 Table of Contents:
Step 1: Upload content assets.
Step 2: Create a playlist and add the required content assets.
Step 3: Create a schedule and add the playlist.
Step 4: Create the screens required:
Step 5: Create the targeted tags:
Step 6: Apply targeted tags to content
Step 1
Upload content assets.
- Using the standard content upload process.
⚠️ IMPORTANT: Before uploading any content, select the correct video codec setting for your hardware and operating system. Using an incorrect setting will prevent your content from playing on the screens.
⚠️ Keep videos under one minute where possible. Shorter videos provide the best playback performance and help maintain accurate synchronisation. Longer videos are more likely to gradually drift out of sync. - ❗Playback drifting out of sync because videos are too long does not indicate a fault in the NowSignage application.Step 2:
Create a playlist and add the required content assets.
- Follow the standard process for playlist creation
⚠️ Only create one playlist.
Step 3:
Create a schedule and add the playlist.
- Follow the standard process for schedule creation
⚠️ Only create one schedule for the playlist.
Step 4:
Create the screens required:
Step 5:
Create the targeted tags:
- From the left-hand CMS menu, select 'Tag Manager'
- Select 'Targeted Tags'
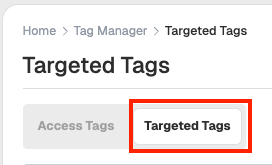
⚠️ Important: Ensure you have accessed the Targeted Tags option and not 'Access Tags's as they serve a different purpose.
- Using the 'Add new targeted tag field - enter the name of your tags.
- Click 'Add' to save the tag

Once all tags are created, you can now assign the relevant tag to the screens using two methods:
Method 1:
- Directly within tag manager:
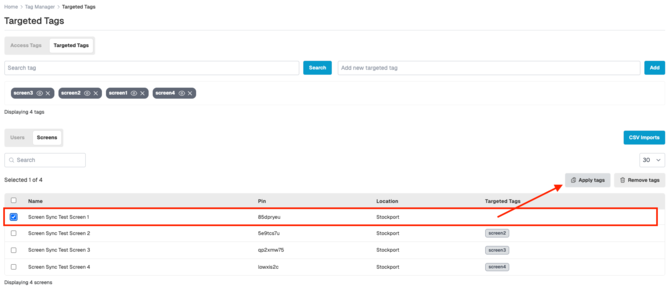
- Highlight the screen from the list of available screens.
- Click 'Apply tags'
- Click the required tag for the screen
- Click 'Apply tags' to confirm.
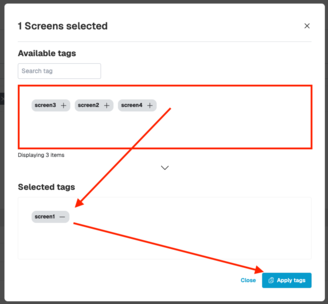
- Once completed, the targeted tags applied to each screen will be easily identifiable.

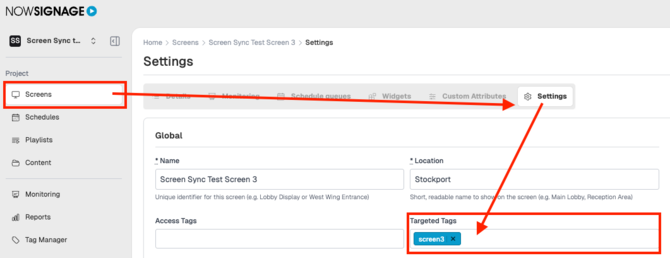
Method 2:
- On the screen settings menu > click into the screen > Settings > Targeted tags
Step 6:
Apply targeted tags to content
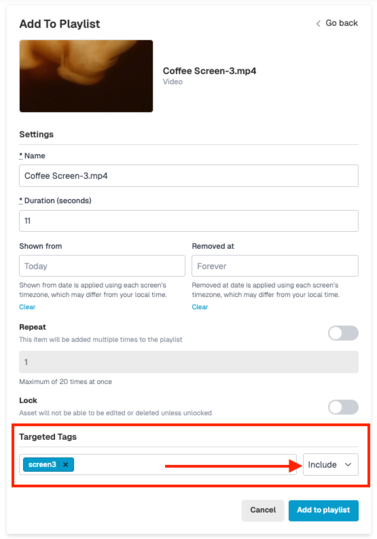
Targeted tags can be applied during the following steps:
- When adding the asset to the playlist using the 'targeted tag' field (make sure to set it as 'include')
- When editing an asset added to the playlist > click the pencil 'edit' icon.
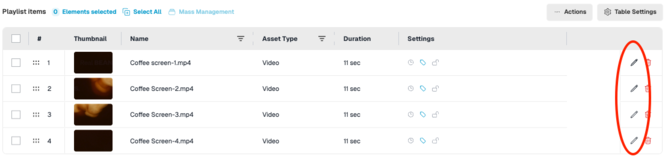
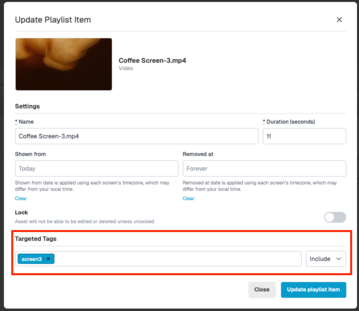
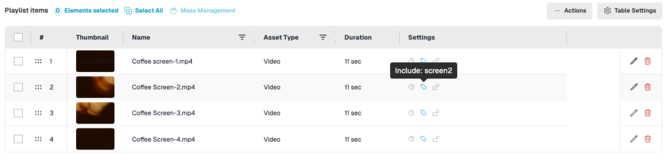
💡 TIP: Once all tagging is actioned, hover over the 'tag' icon under the 'setting' column to confirm which tag has been applied to a screen.
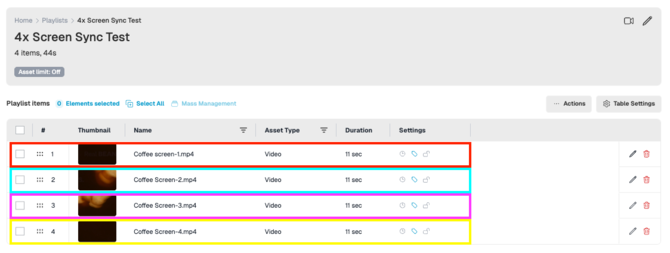
Screenshot to demonstrate a single playlist containing all content that is tagged at the content and screen level.
RED = Tagged content will only play on screen 1.
BLUE = Tagged content will only play on screen 2.
PURPLE = Tagged content will only play on screen 3.
YELLOW = Tagged content will only play on screen 4.
💡 TIP: Check the screen preview area and playlist item to confirm that the correct content is assigned to the correct screen.
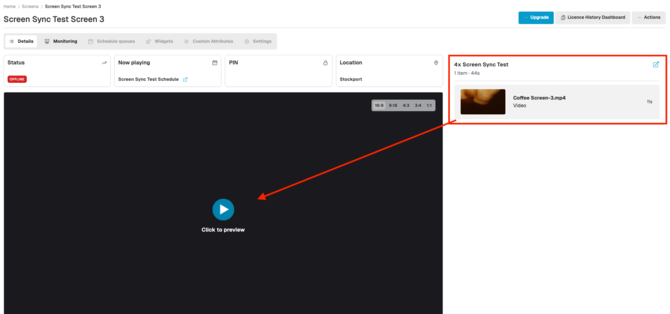
Completion of all 6 steps confirms that content and screens are now correctly configured with content assets and tagging.
Checklist: Ensure the following before proceeding to the screen sync steps:
- Content assets are uploaded in the correct video codec setting.
- Targeted tags have been created.
- Content assets are tagged with the required (correct) tag.
- Screens are tagged with the required (correct) tag.
- Only one (single) playlist has been created.
- Only one (single) schedule has been created.
Step 7:
How to Set Up Screen Sync
1. Install the Screen Sync App
In your project:
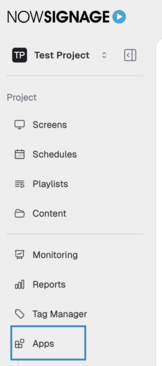
- Navigate to the App Store
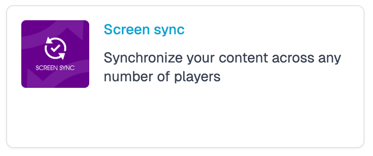
- Click the Screen Sync app
- Select Install App
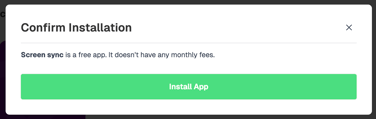
- Confirm the installation
2. Create a Sync Group
Once the app is installed:
- Click Add Sync Group
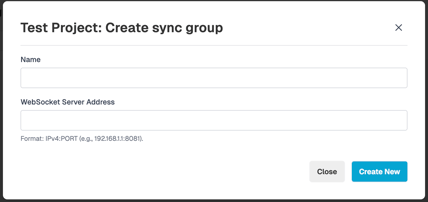
- In the WebSocket Server Address field, enter the IP address retrieved from the media player, followed by
:8081
Example: 192.168.1.10:8081
⚠️ NOTE: The method for finding your media player's IP address depends on its hardware and operating system. Refer to the Screen Sync setup guide for your operating system for the correct steps.
- Click Create New to save the group
- Add the master screen first using the device whose IP address was entered - click the '+' next to a screen to include it in the sync group.
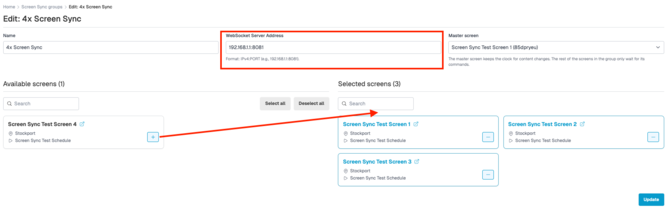
- Add the remaining screens to the group
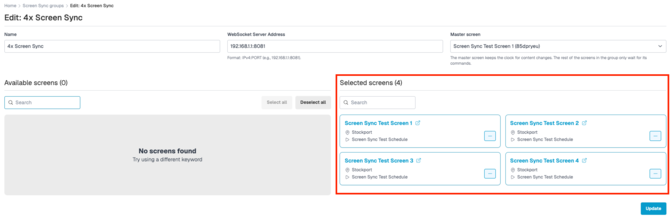
- Click update to confirm the group selection process is complete.
3. Reboot All Devices
Once all screens have been added, reboot all devices via RDM or physically on each device.
Screen sync setup is now complete!
Once the devices have rebooted and launched the NowSignage application - Please allow for a couple of loops of the playlist for the screens to communicate (via the Masters local web socket connection)
Best Practices & FAQ
-
Keep videos under one minute where possible. Shorter videos provide the best playback performance and help maintain accurate synchronisation. Longer videos are more likely to gradually drift out of sync.
-
Plan for an initial setup on site. In most cases, Screen Sync should be configured in person. Where this isn’t possible, a reliable remote device management solution (such as TeamViewer) is strongly recommended to assist with setup and troubleshooting.
-
Standardise your hardware and software. While Screen Sync can operate across different hardware platforms, the best results are achieved when all players use the same hardware model, app version, and firmware version and have accurate date and time settings.
-
Use wired Ethernet connections wherever possible. Ethernet provides greater network stability and lower latency than Wi-Fi, helping to ensure content remains synchronised across all displays.
-
Consider using a dedicated sync anchor. Where appropriate, an additional Android player that isn’t connected to a customer-facing display can be used as the Screen Sync anchor, providing a dedicated device to coordinate synchronisation across the display network.